
How To Use Transfer Paper
How to use transfer paper
We design, curate & print our Transfer Paper designs on water soluble transfer paper, if you haven't used this before, follow the steps below for the best result. Jump to the end for tips & troubleshooting!


Condition your clay & roll your slab down to your preferred thickness.
Ensure your clay slab is larger than the Transfer Paper or cut the Paper down smaller as needed for your project.
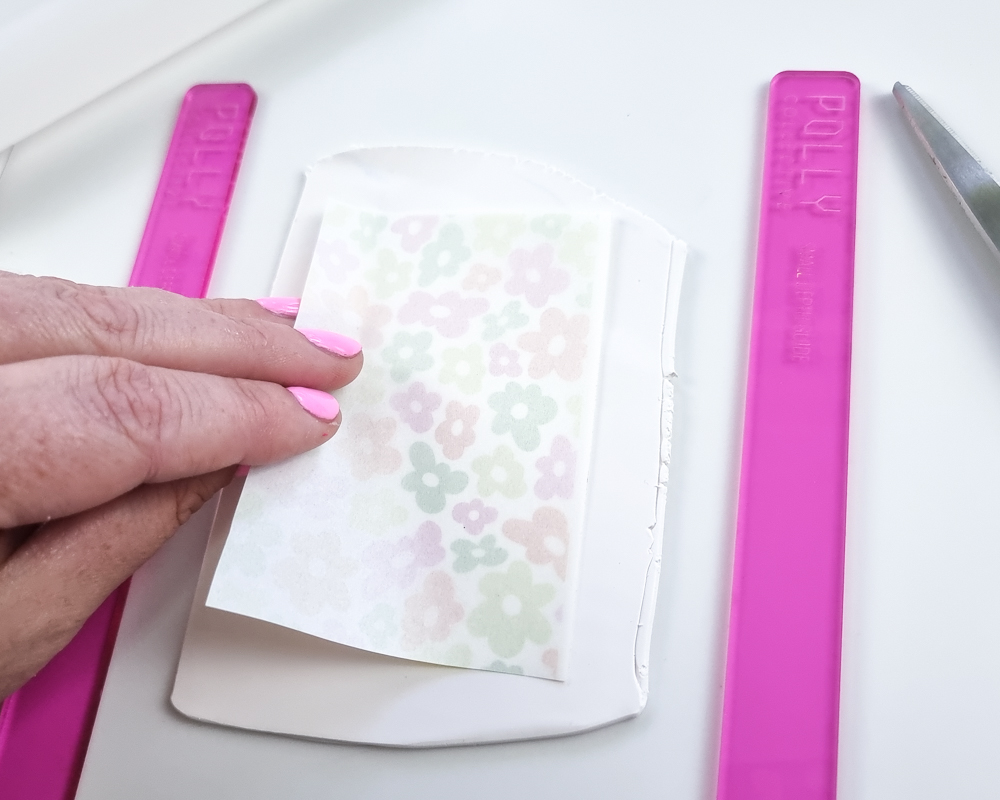
Place the Transfer Paper printed side down onto the clay & then burnish the paper to your clay with a roller or fingers. This is the most important step. There should be a complete seal, no air pockets or movement of the paper or lifting edges.
You may find flipping the clay over and rubbing on your clean, smooth worksurface helps with extra adhesion.


Mist with water or run under a gentle stream of tap water & let the water turn the paper into removable pulp while leaving the art behind.
Gently remove the bulk of the pulp from your newly patterned slab with gentle rubbing of your fingers.
You will be able to feel once all the paper has dissolved, be patient & gentle as sections of the pattern can be removed, especially if it was not burnished well.


If your faucet is a bit powerful or you'd prefer not to move your clay (this can be wise if you're struggling with adhesion) you can do the water process at your desk.
Use a Misting Bottle or a bowl of water & spray/drip onto your Transfer Paper. Allow to saturate & remove the pulp. Repeat this process until all pulp is gone.
You may want to do a final rinse under the tap once there's no chance of paper movement!

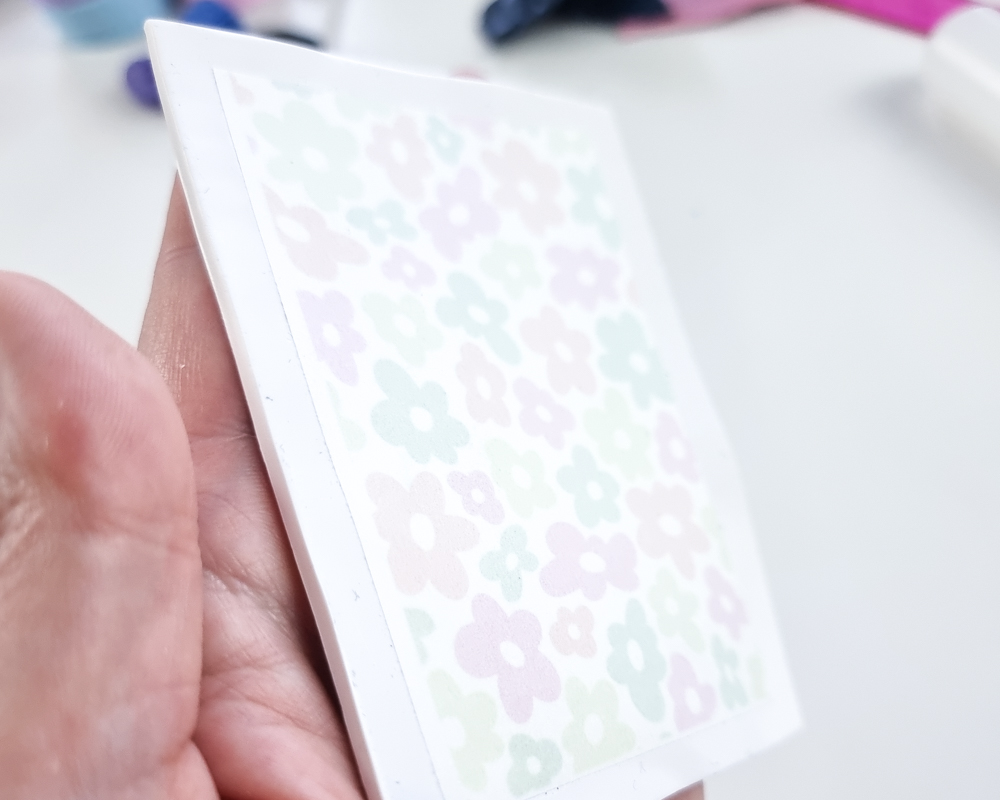
Set aside and allow clay to dry before cutting with shape cutters & baking as you normally would. Water is completely safe for your clay & cutters but if the slab has dried you will get a smoother cut & not risk damaging the print
Transfer designs cure & adhere once backed & can be left unsealed for a natural matte finish.
For a protected and elevated look, try sealing with varnish (i.e Cernit Matte or Sculpey Gloss) or coating with a doming resin.

Tips & troubleshootinG
- Take it slow & gentle - we all make mistakes, if you look at the slab below, one of my corners definitely wasn't adhered well! Don't rush & be soft with your work and you'll get it in no time.
- White clay will show the designs best, though Pastel can be very effective - just remember, any "white" bits on the paper will become clear. So if you have a 'white' looking flower, it will become the colour of the clay!
- Black Only Transfer Papers can be used effectively on all colours - try them on a bolder or neon colour for a strong effect.
- Leave a 1cm edge of clay around the paper. If your transfer paper goes right to the edge, its not going to seal as well.
- Make sure you pop all the pieces of paper you're not using out of the way - a drop of water & they will begin to dissolve!
- Using your roller in a circular motion is an effective way to burnish it on. Not enough pressure to squish the clay though.
- Once you've burnished the Transfer Paper to the clay, minimise moving the clay. If you can transport your piece to the tap on the surface you burnished it on - do that! (i.e small tile or shaping tool!)
- If your slab has dried and it looks dusty or lighter, you may not have removed all the pulp! Repeat the wetting process to get those pesky bits of pulp off
- It's important to remember print is never as bright or saturated as screen - to get a real pop from your pieces consider doming them with Epoxy Resin or if you're not ready to resin, try a Shiny Glaze